(The content on these pages may be freely used for educational, noncommercial purposes provided appropriate references are provided. Commericial users are kindly asked to contact me first.)
Building Clocks
I have been fascinated with mechanical devices, in part because they're tricky to build. (I grew up with carpentry and building circuits, neither usually has much motion.) Mechanical clocks just seem magical. The nexus of the magic (so to speak) is the escapement, which converts a nearly constant force into a constant motion. Once you have constant motion, it's possible to time other motions. In high school, I tried to build an anchor escapement, which is probably the most common kind. However, I failed miserably: the device didn't move well and bound frequently.
I figured that the reason for my failure was basically a lack of manufacturing tools -- if you look around at others (for instance Gary Mahony, Brian Law, Ron Walters, Don Corson, or Clayton Boyer) who have built clocks in their workshops, you usually find a high degree of workmanship. I just assumed that was necessary! But, then I saw Brian Law's verge and foliot escapement, in which the crown wheel didn't involve cutting teeth. Instead the teeth were metal studs -- that's something I could build!
Clock #1
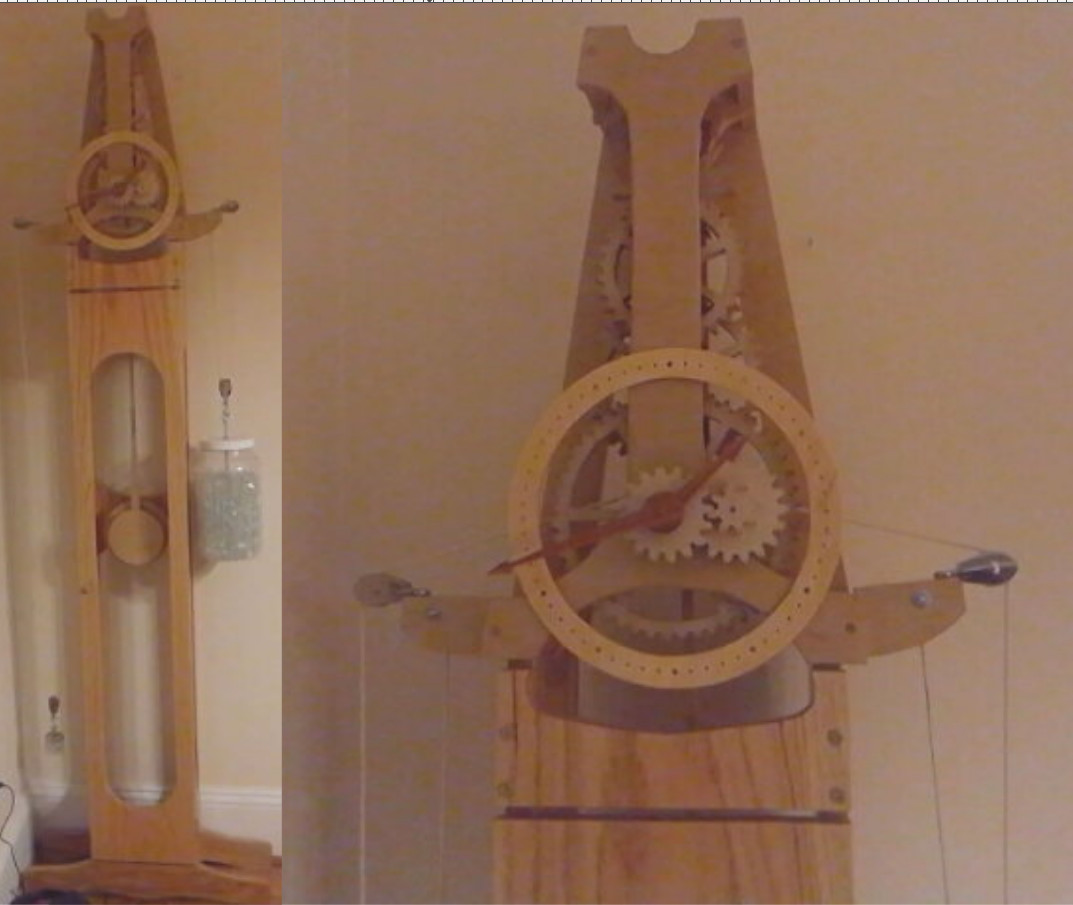 This was my first successful longcase clock, and is in my dining room. It is a wooden clock with recoil anchor escapement, and will run for approximately 26 hours. I designed the clock using Inkscape and used an involute profile on all wheels (probably horrifying proper horologists everywhere). The minute hand takes two hours to complete a cycle due to a counting error, but hour hand goes as normal. It is driven by 10 lb of glass beads with two fall pulley, held by a friction barrel.
Clock #2
 My second clock was a five minute timer with a double three-legged gravity escapement. It's driven by one pound of stones and is attached to the hallway wall near my kids' bedroom. I use it to help keep them on track when getting ready for bed.
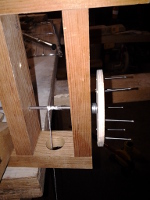
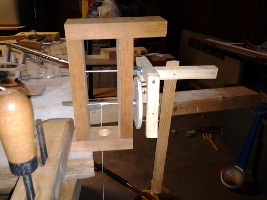
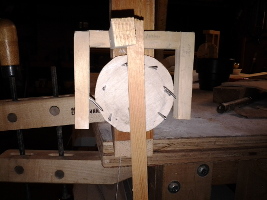
Verge and foliot
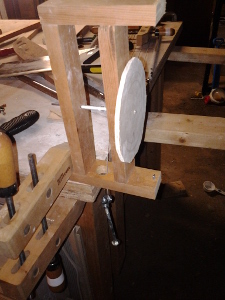
The verge and foliot is the oldest form of escapement. It also seems to be the least tempermental, if somewhat inaccurate. I just wanted to construct the escapement, and so laid out some plans. In order to keep the friction low, the verge (the rod) is hung on between two strings. (This is inspired by the mirror galvanometer and by the Lissajous figure maker I already had working.
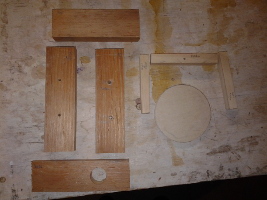
The crown wheel is just a thin wooden plate with nails hammered in at opportune locations. The locations are critical, and depend on how the verge and pallets are placed, and so are the last things to be installed. So to begin, I cut out the main pieces of the frame and crown wheel, and drilled the holes.
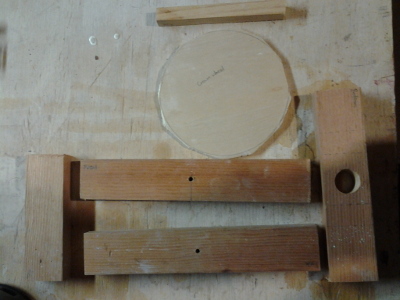
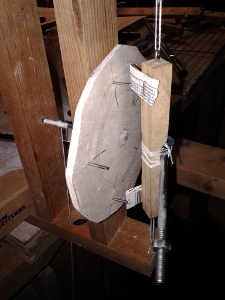
 The crown wheel was attached (press fit) to a metal rod that threads through the frame. It should spin freely. Then, the verge is attached. I made pallets from a folded piece of cardboard, stapled onto the verge. Once these were assembled, I hammered the first nail into the crown wheel, and cut it to what appeared to be the right length. This length is actually kind of critical: you want the pallets to easily engage and disengage from the nail. Now to add the other nails! Turn the crown wheel so that the pallet just disengages from the first nail. Place the next nail so that it just engages the other pallet. Once there are multiple nails, you want exactly one tooth (nail) to be engaged by the pallets at all times. It might take a bit of trial and error, but I did a bit of computations to figure out how tooth length, verge position, and pallet length need to be chosen. Some variability is acceptable.
 I was delighted, and admittedly a bit surprised when it worked! Here is a video of the escapement running, after a little bit of tuning.
Anchor escapement
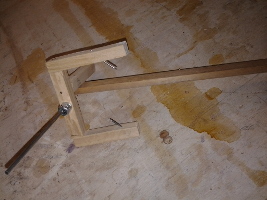
 Emboldened by my success with the verge escapement, I decided to try to build an anchor escapement. Again, I used nails as the teeth of the escapement wheel and essentially the same frame as before. To simplify the construction, I made the anchor teeth out of nails as well. After constructing the anchor and placing the first tooth in the crown wheel, I followed the principle that one tooth must be engaged at all times. Unlike the verge escapement, balance of the pendulum is critical. If it's out of balance, one of the anchor teeth will never disengage and the escapement stops. On the other hand, this escapement "wants" to run with lower torque than the verge escapement. I'm pretty sure that the pendulum is currently overdriven.
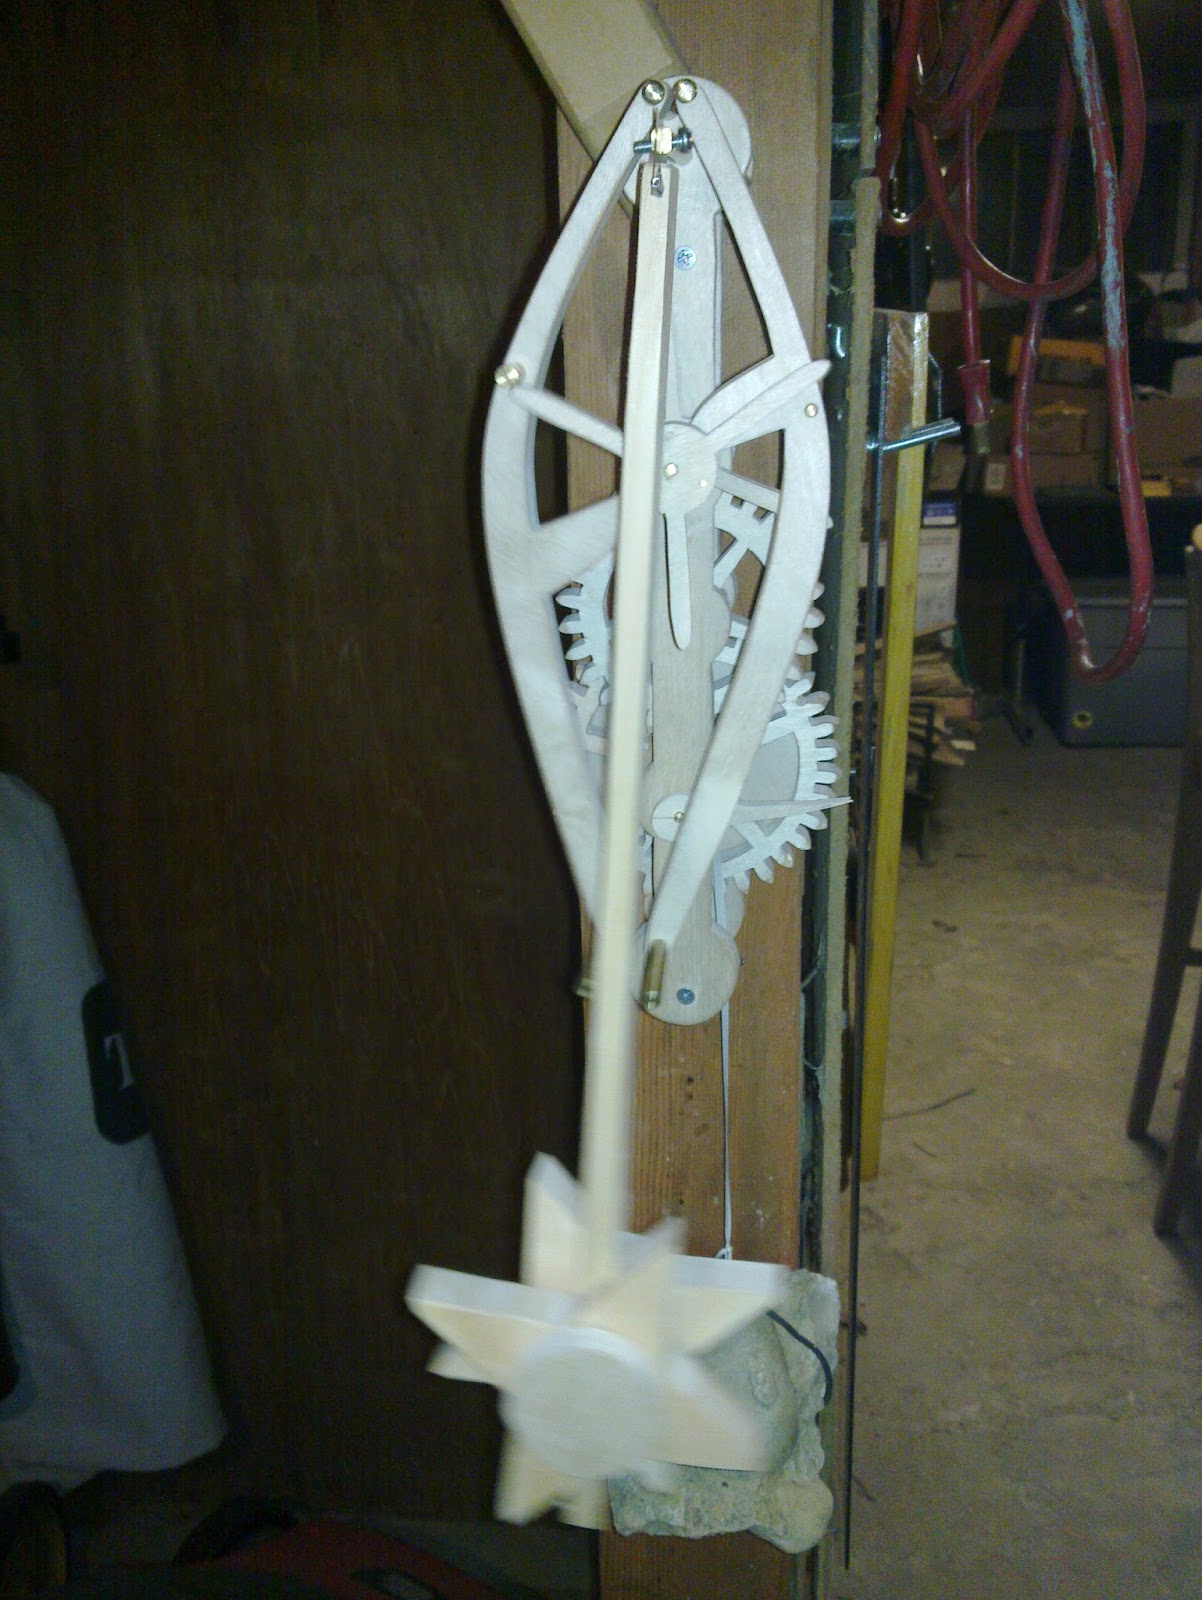
Amant escapement
Since the Amant escapement looked tractible to build, I drew up some plans. I cut the larger wheels from 1/4" plywood and cut the pinions and pallets from 1/2" pine. I had a bit of trouble getting it to run smoothly, because of two factors: friction of the pins against the pallets and issues with gear meshing. The friction issue was improved by adding additional weight to the pendulum (a heavy pair of vice grips) and also substantially more drive weight than I expected. The pallets needed a bit of tuning -- I mounted them with hot glue to allow them to be adjusted. To help the gears mesh, I filed the teeth on the larger wheel to allow more room for the pinion teeth. It's not completely reliable, but will run for half a minute or so!
Amateur Radio
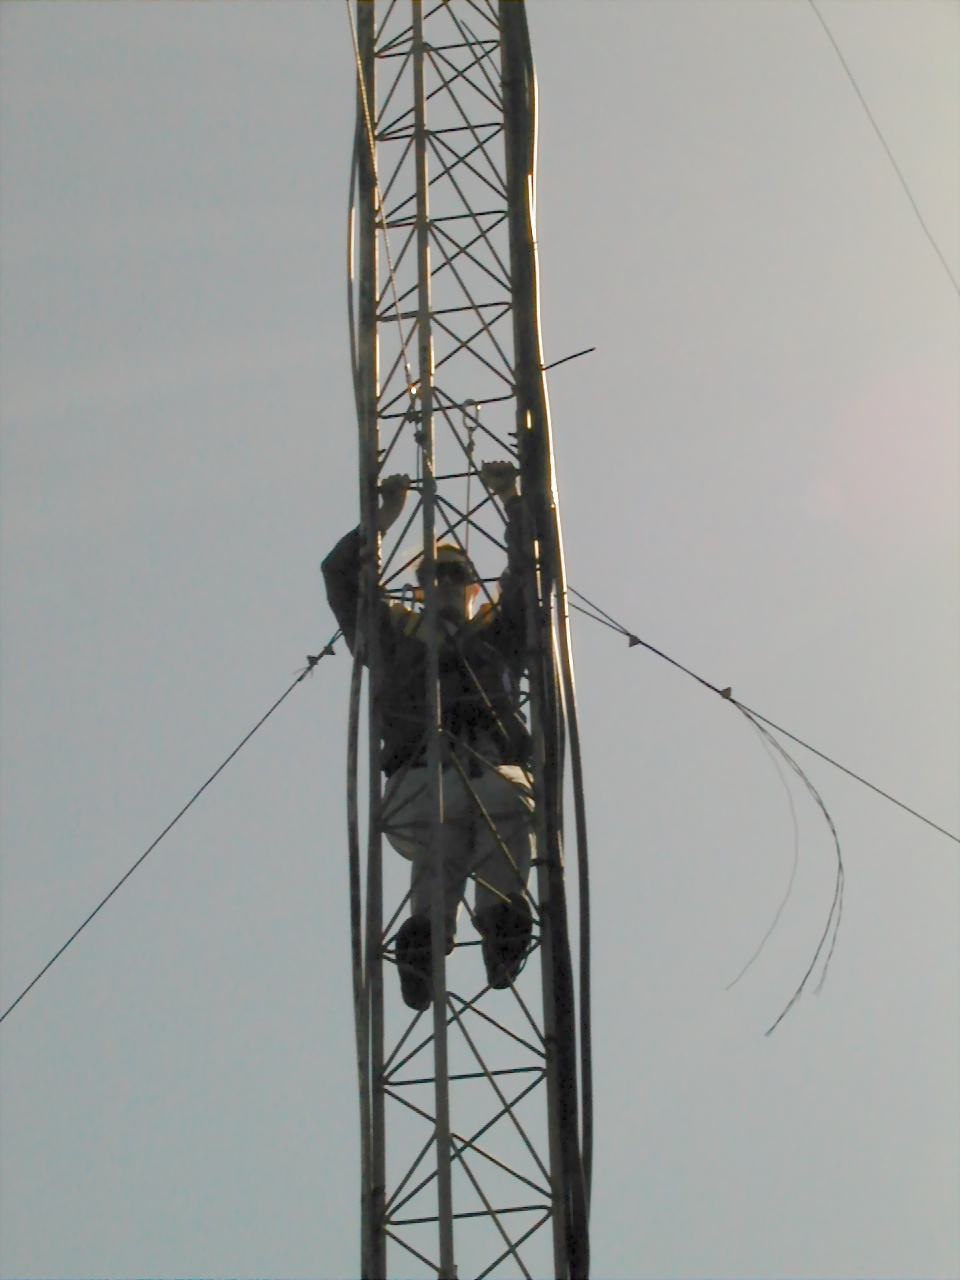 When I was a child, I always looked at my father's old radio gear (and his call sign KA1GCZ) in my parents basement with a certain sense of awe. Radio is a bit magical, even once you know how it works. Right before heading off to college, I got my amateur radio license (call sign KB1DDS). Once at college, almost my first act was to join W2SZ, the amateur radio club. That was fortuitous as I met my future wife (call sign N2SZ) in that organization, but it also gave me the opportunity to explore some of the more interesting possibilities of the hobby. I learned to climb radio towers to install and repair antennas! I alo met some of W2SZ's illustrious alumni, who call themselves the Mount Greylock Expeditionary Force. They focus on competing in VHF, UHF, and microwave contests. (They also get mistaken for being alien-hunters and talking to the dead, but that's another story.) They run an exciting operation three times a year: I've helped out on occasion, and it is very impressive.
Building computers from gate ICs
 Lots of people like to build their own computers from stock parts. It's fun, and I've done it both for work and amusement. However, in high school, I encountered an old 74xx-series logic databook on my father's shelf. The book contained descriptions of small integrated circuits that do very simple things, like AND gates, OR gates, and registers. I thought to myself, "wow, these are just the things I'd need to build a computer entirely from scratch!" I was delighted to find out that this is what such chips were intended for and that they can still be bought. So I set about in the somewhat eccentric hobby of constructing my own computer processors, in the style of the minicomputers in the past! (Here's a different take on the same idea; build your own gates from transistors! There's even plans for a 4-bit computer...)
My first attempt (in high school) was an asynchronous processor, with an elaborate state machine controller. (Ill fated plans are available.) This experience is of course is why I am still interested in asynchronous circuits. Sadly, the machine didn't work, at least as a single unit. The different components didn't work together due to synchronization problems.
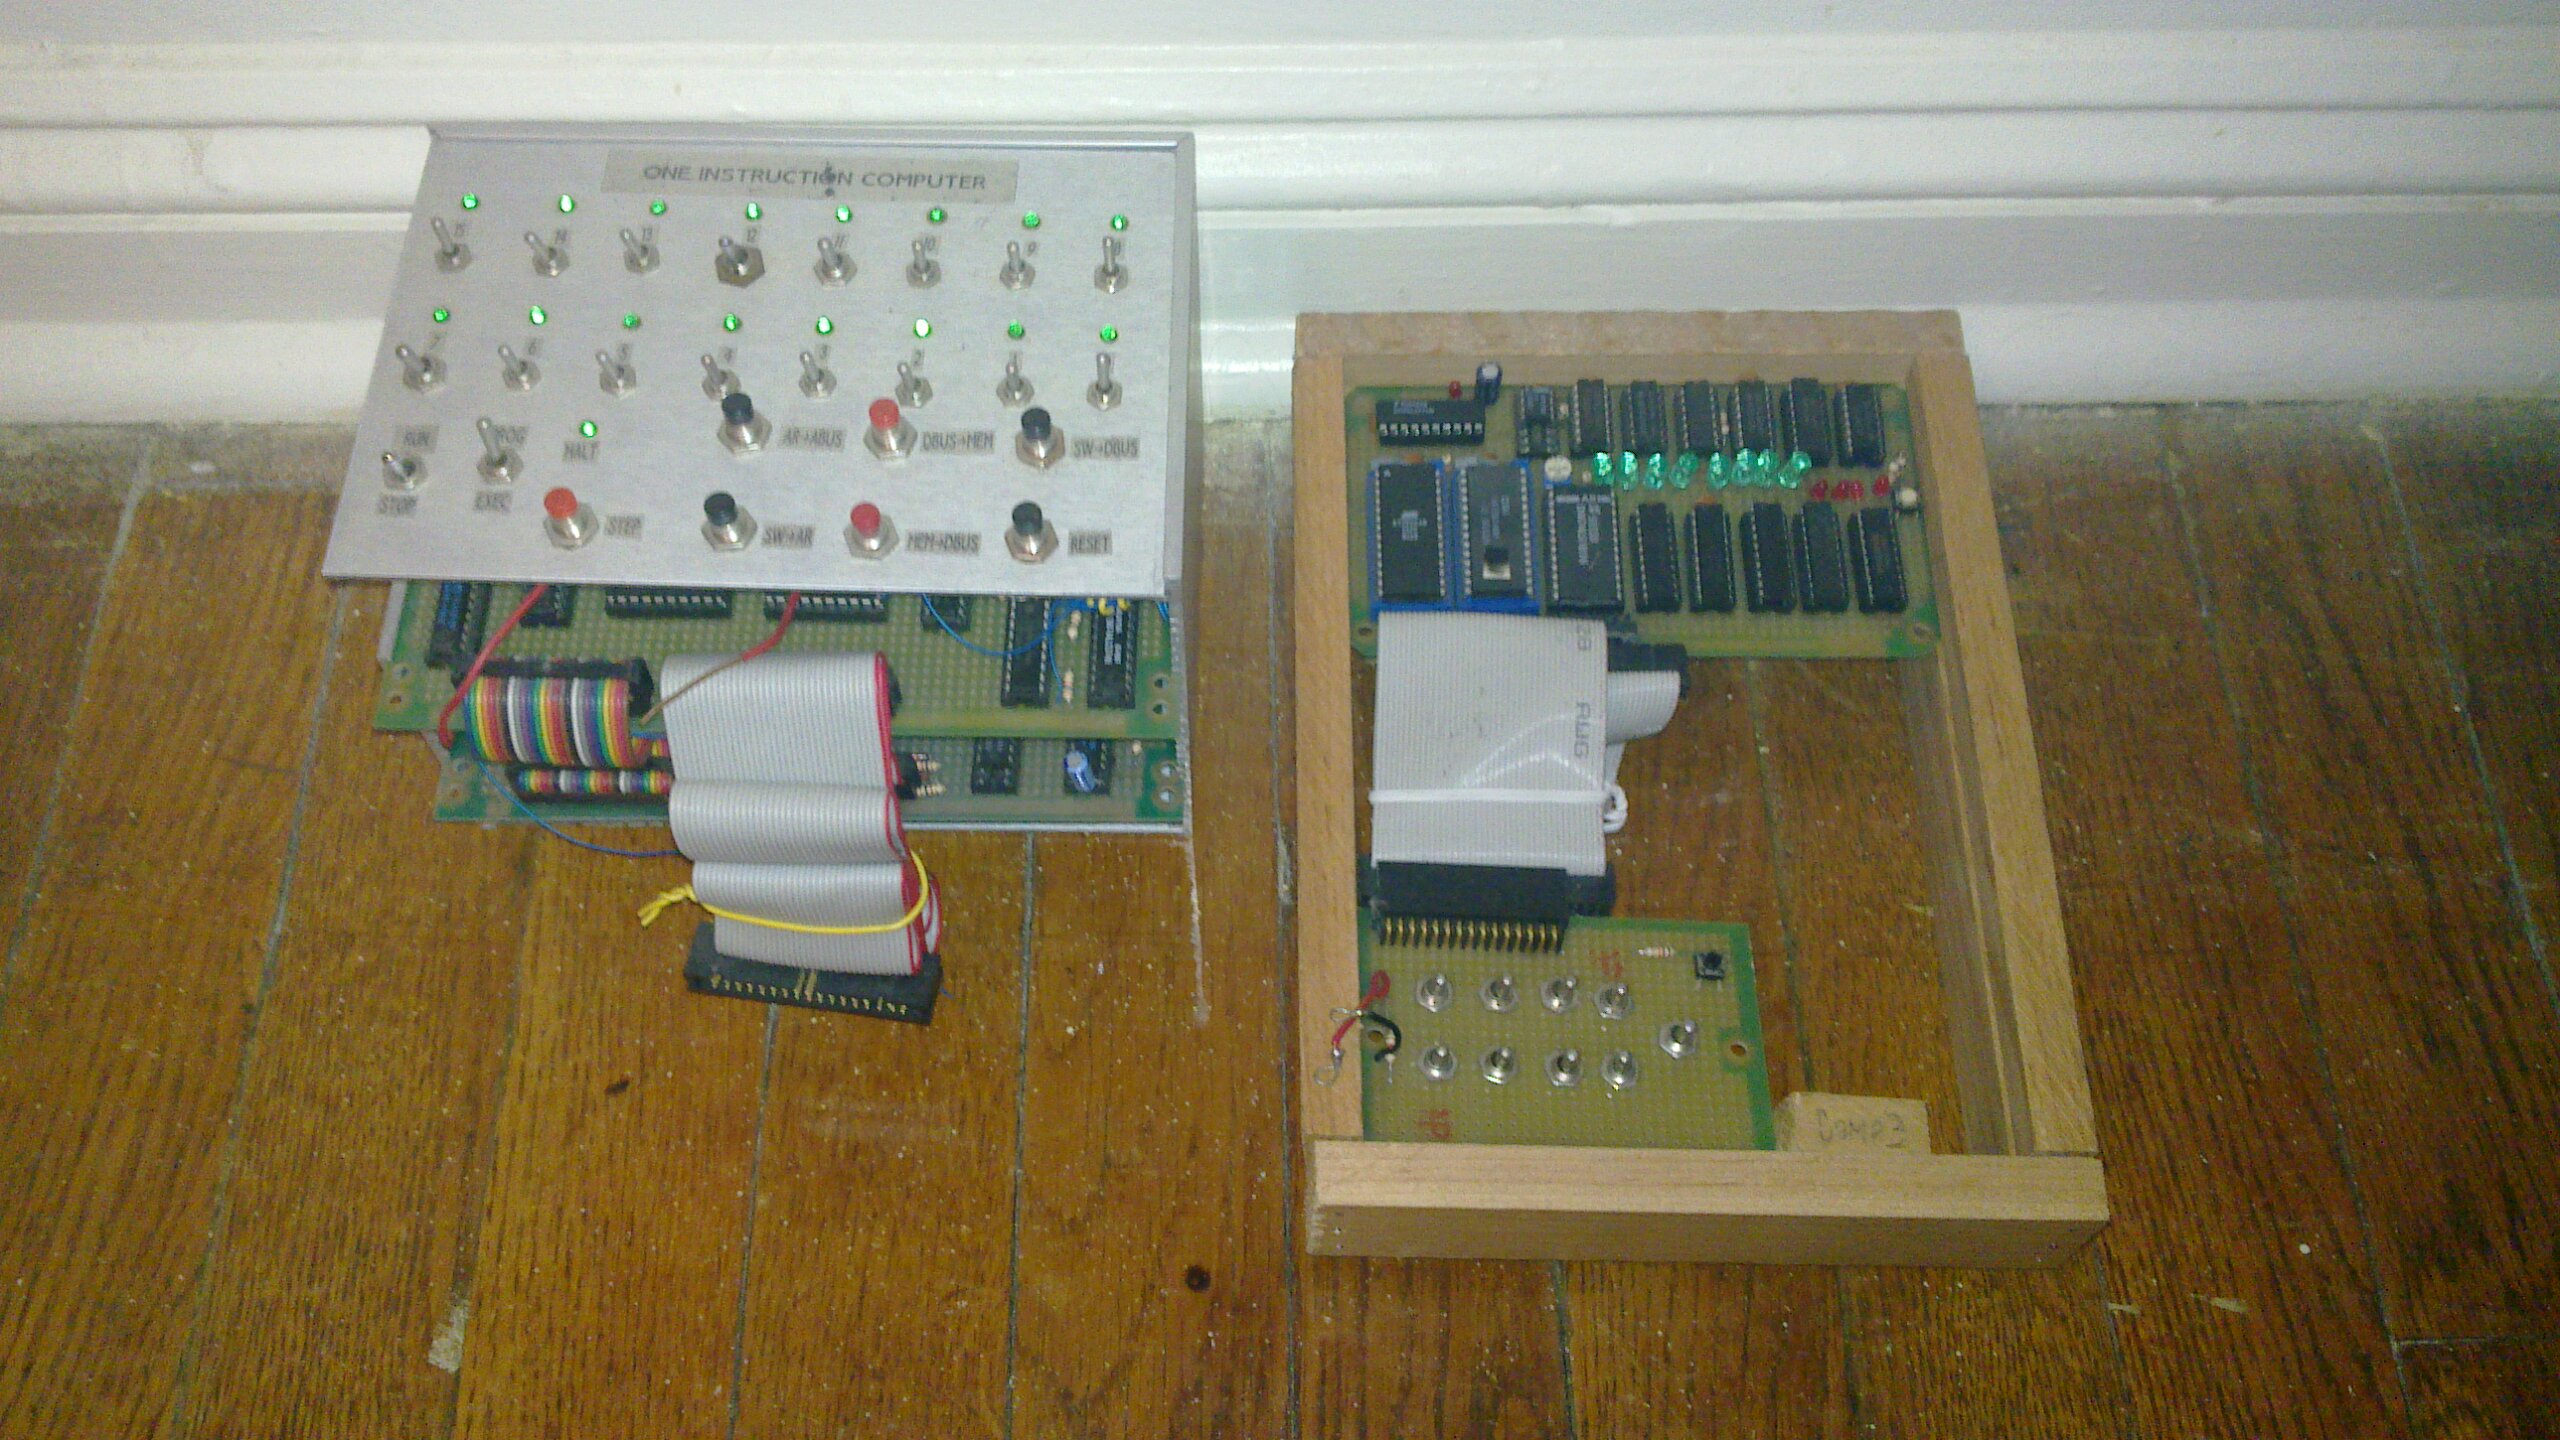
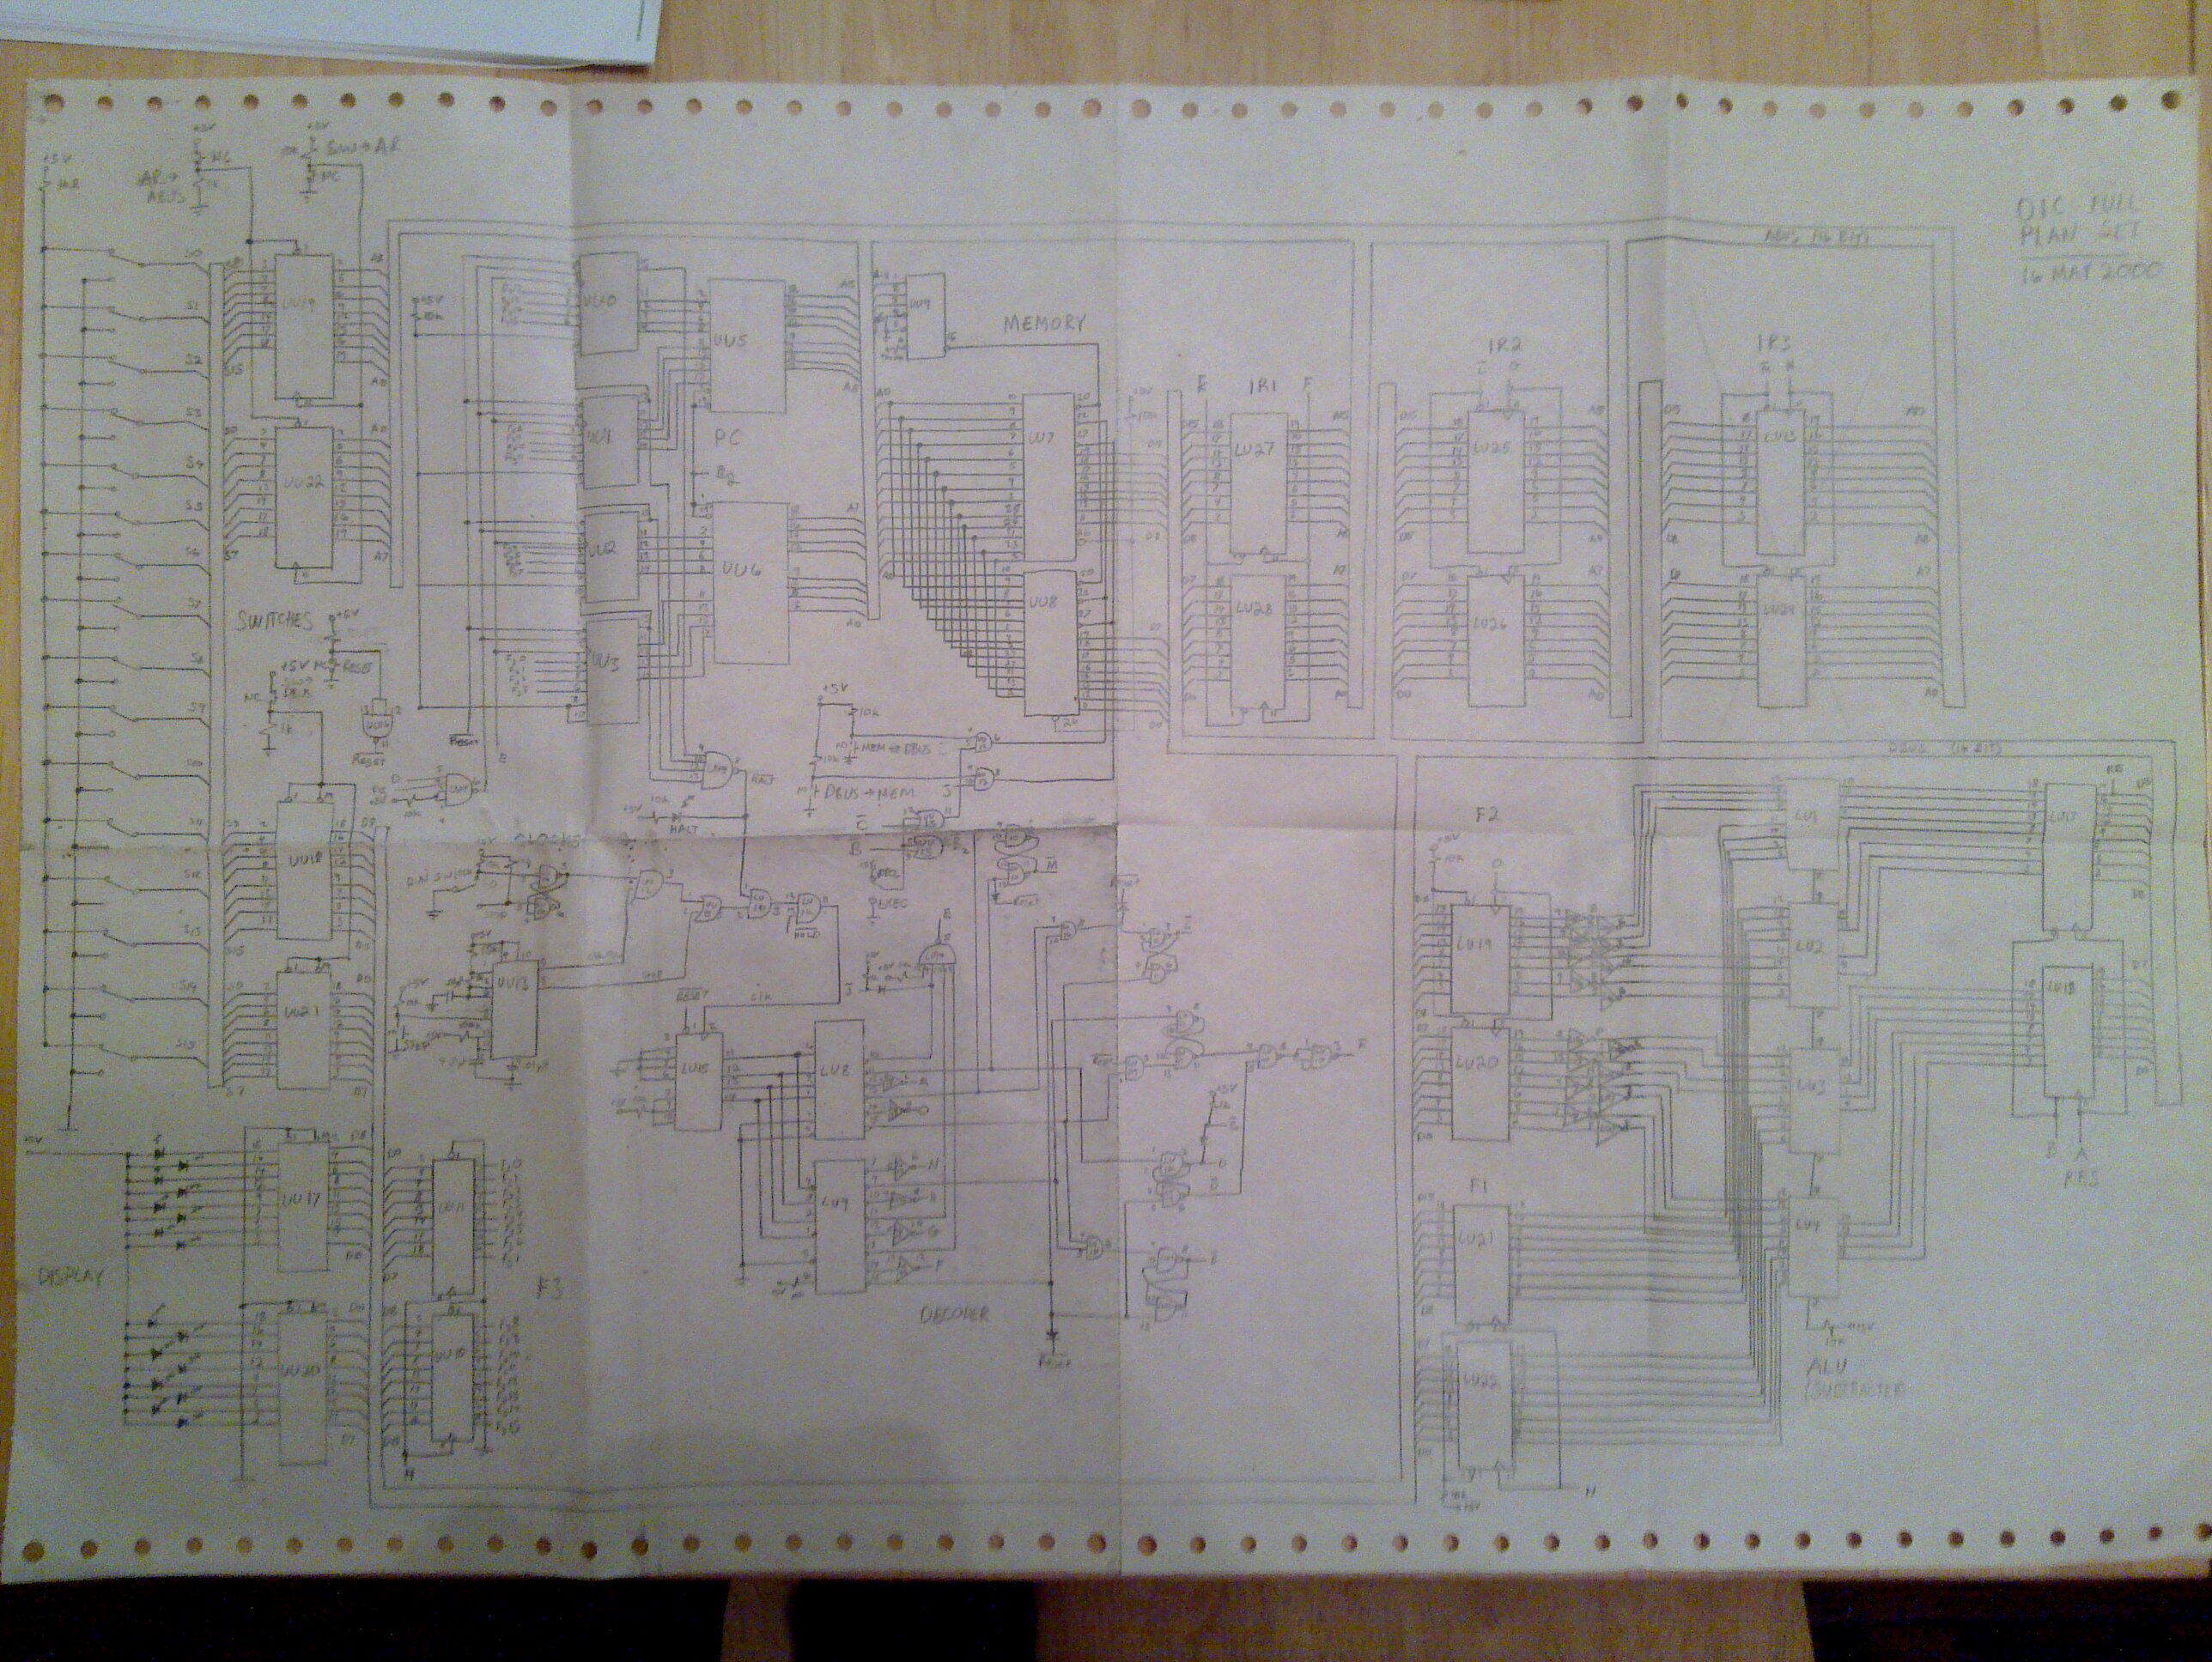
That wasn't the end, as I tried again with a synchronous design in my sophmore year of college. I constructed a machine that has a single instruction: subtract and branch if negative. Never mind the difficulty of programming such a machine, it is a complete computer! While I chose a synchronous architecture (timing diagram, complete schematic (blurry), logic diagram), and a carefully constructed controller, I didn't realize the importance of filtering the power supply on the processor board itself. Therefore, the machine behaves erratically at certain points in the execution cycle. I'm pretty sure that adding bypass capacitors at each chip would fix the problem, but I haven't tried.
My third attempt scaled back considerably from the previous attempts. I chose a Harvard architecture (in which code and data are separate) and permit computed branches to occur after every instruction. This simplifies the execution cycle as there are fewer conditional states to worry about. I was a whole lot more careful about signal quality and synchronization on this machine, and it works! Here is its instruction set. The design is summarized in a one page schematic and these Verilog sources. You can also use a custom assembler, which also includes example programs. To build one of these, you need an EEPROM programmer and data files. The latter link contains source for a small Linux program to drive the programmer.
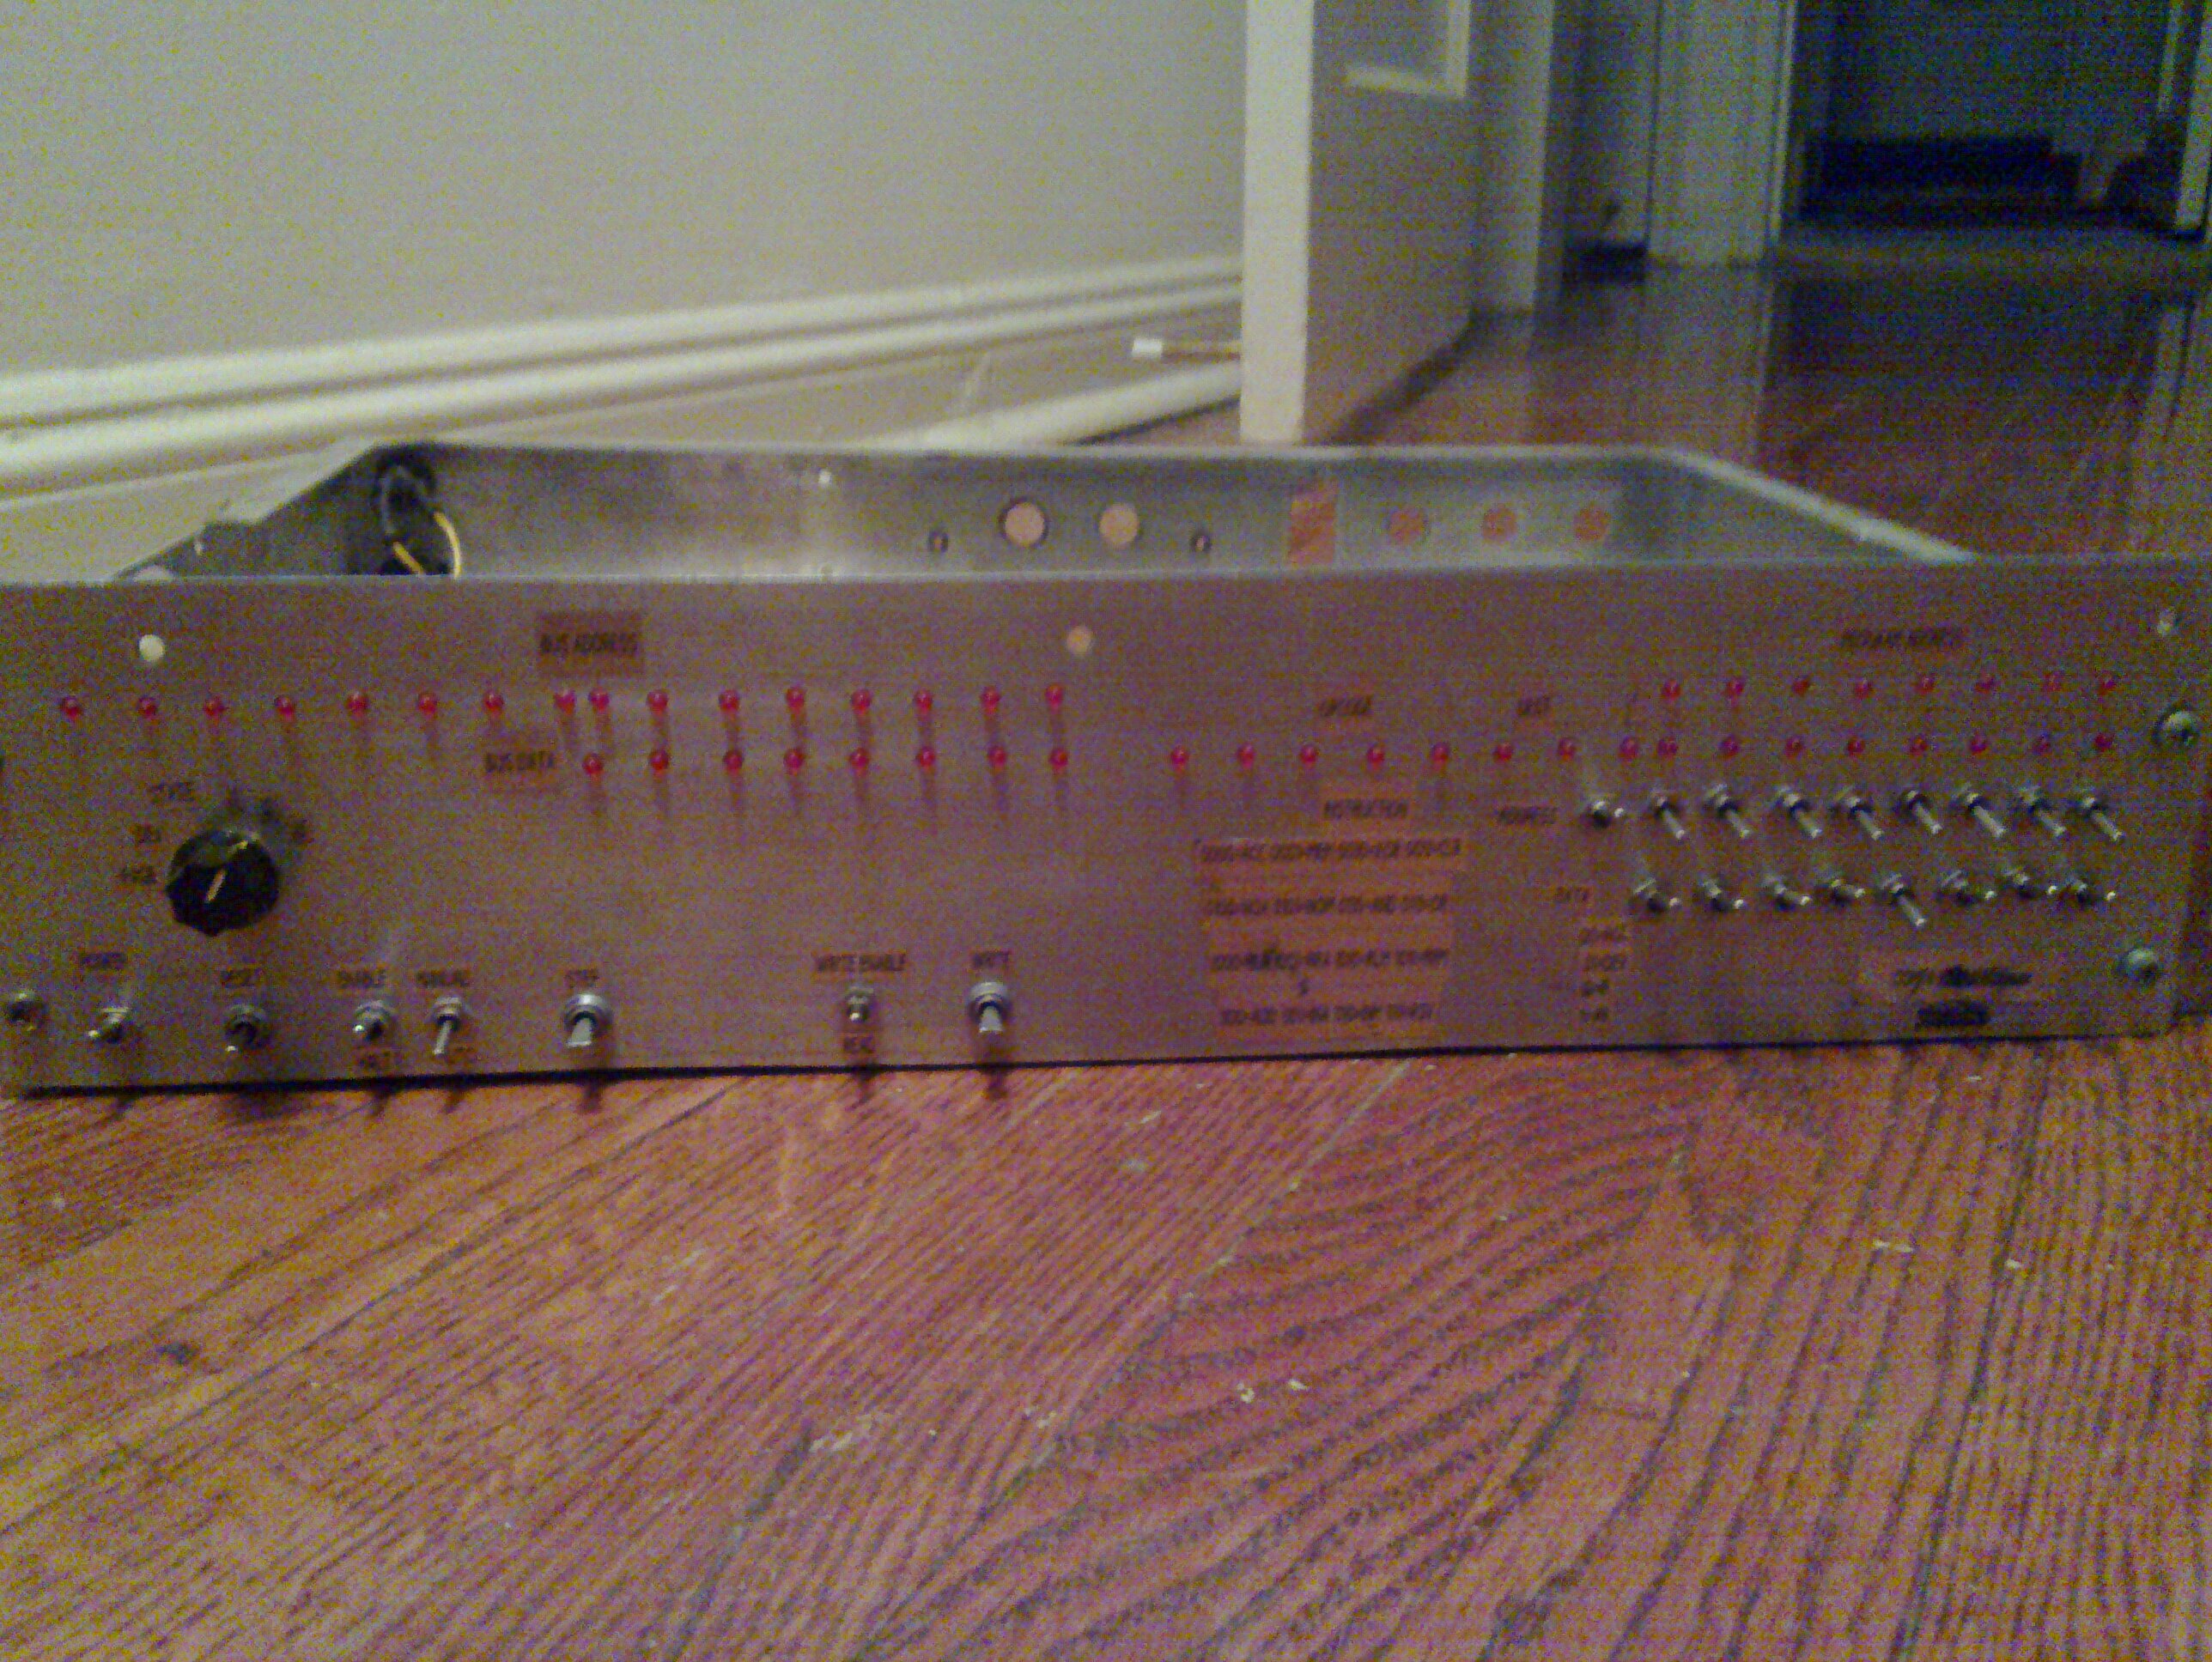
Building on the success of my third machine, I tried a more ambitious machine, with more memory, instructions, and slightly more disciplined branches. This machine's instruction set, Verilog source, plans,and EEPROM files (use above programmer) are available. I rather like this machine, as it is a nice balance between usability and complete simplicity. I had lost it for a while, but recently found it buried in my garage at the bottom of a box!
Retrocomputing
I'm not just a fan of using 74xx-series logic to build machines of my whims. I also enjoy the machines that were built originally with these chips. For instance, I have a pdp-11/45 (shown here being operated by my son, Edwin), that I actually found on a trash heap at RPI. It had no memory, no peripherals, no power supply, and had signs of physical abuse. After several years of careful testing, detective work (including leads from RPI staff, who were able to locate the engineering diagrams and some core memory), and luck, I brought the machine back to operation. It's a joy to program, especially from the front panel, and certainly "looks the part" of a real computer.
At roughly the same time, I intercepted one of RPI's VAX 8530 being hauled for scrap. That machine, while not being as badly damaged as the pdp-11, still needed some care. It had a tape drive, racks of hard drives, and the like. It was missing the console computer that was required to load the microcode (and hence was unbootable), but a bit of effort on the part of myself and a few friends found one. I haven't seen that machine much, since I graduated from RPI and a friend took over its care. Sadly, the RPI Electronics club is now defunct, so who knows what has happened to the machine!
Cooking
You can read about my recipes at my Recipes blog, which largely functions as a repository for the meals that "worked." It is too often the case that we forget what made a particular meal especially memorable, so at least with a blog that information is not lost.
Gardening

I would not have expected to get drawn into gardening, but when our family lived in Ithaca, we had an ample yard that was well-suited to gardens. A previous owner had a old, scrambling rose plant that bloomed enthusiastically each summer. I was intrigued, and since Cornell University has a good horticulture school, it also has a good library for plants. So I dug through old manuals of roses, explaining in detail all the hundreds of varieties of roses that were available. After much searching, I found that the rose in question was a "White Dawn," a somewhat rare variety that usually isn't hardy to the area. But since the plant was growing against a fence, it thrived.
At that point, though, I was hooked. I had seen enough interesting roses and other plants to know what I wanted to grow. I have a few at our house now, and the collection is slowly growing.
Camping, Hiking, and Geocaching
 I've always enjoyed being outside, and going hiking, boating, and the like. More recently, our family has gone
geocaching. I usually like to use my n900 phone's built-in GPS with
AGTL to control it. However, we have had good success with a simple Garmin eTrex (no maps) as well.
I've always enjoyed being outside, and going hiking, boating, and the like. More recently, our family has gone
geocaching. I usually like to use my n900 phone's built-in GPS with
AGTL to control it. However, we have had good success with a simple Garmin eTrex (no maps) as well.